Application Team
Important
Your security role determines what you are able to do on this screen. Privileges are required to associate and remove users on the application, associate and remove entities on the application, add and edit entities in the system, and associate and remove entity contacts on the application.
The Application Team screen allows you to manage the team members and external parties (entities) associated with a selected application.
Users
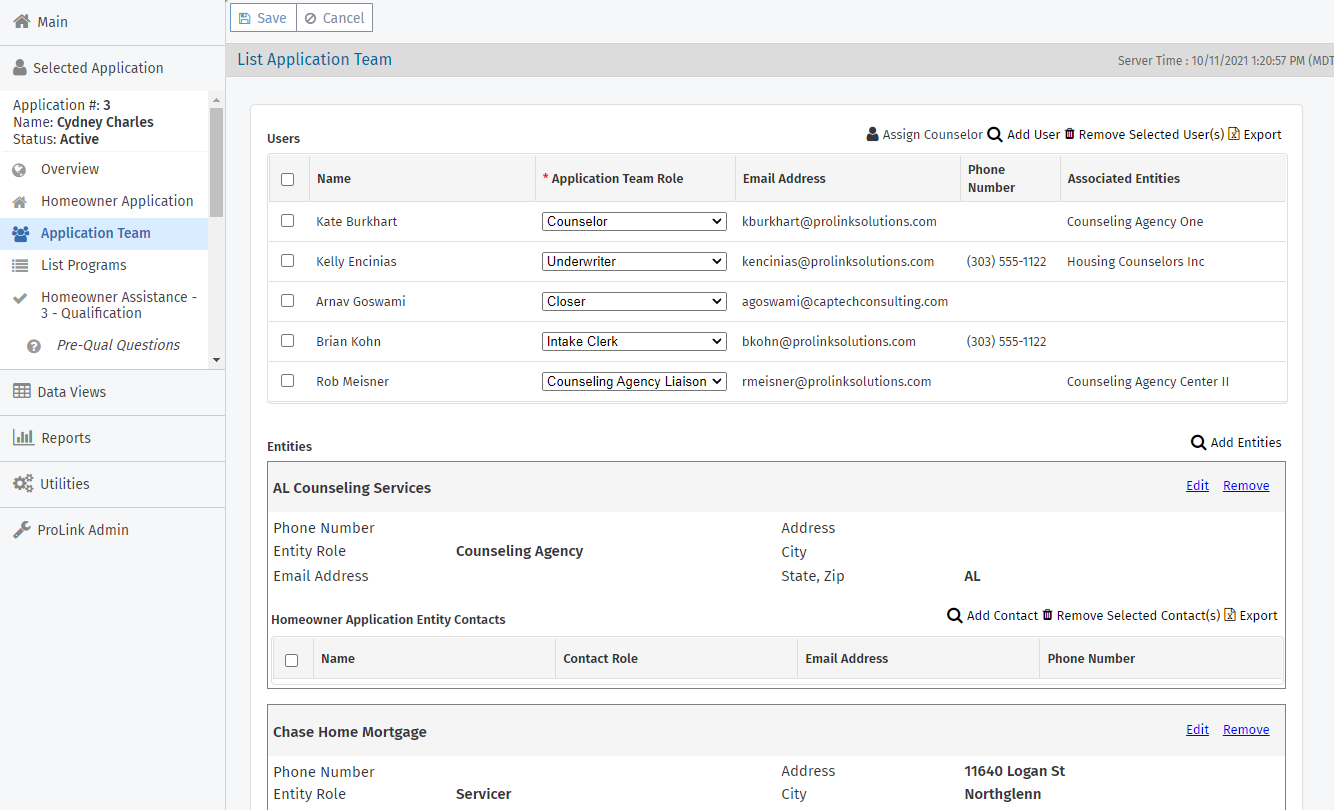
The Users section lists the ProLink+ users and their Application Team Role, which designates the role the user performs on this application.
The system automatically assigns users as follows:
Intake Clerk Business Line Role at creation of the application
Counselor Business Line Role at Stage 2 - Submitted
Underwriter Business Line Role at Stage 3 - Qualification
See Systematic Application Assignments for more information about auto-assignments.
You can also add other users to the application at any time.
Navigate to the application, and then select the Application Team option in the left navigation menu.
The List Application Team screen opens.
Click Add User above the Users grid.
The Find User popup opens.
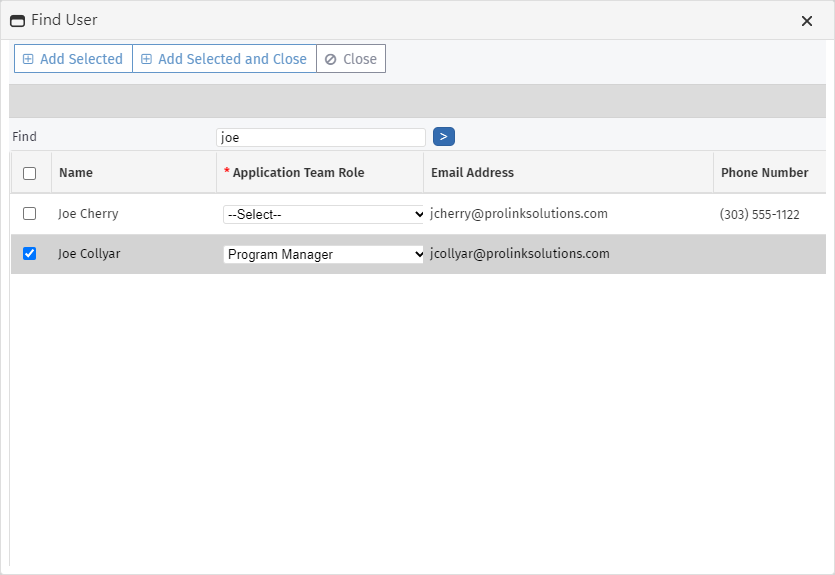
Enter part or all of the user's name, and click
 .
.Select the checkbox of the row for the user to add.
Select the role the user will perform for the selected application.
Click Add Selected and Close.
Tip
If you need to add multiple users at one time, click Add Selected to keep the Find User popup open so that you can quickly add additional users.
The user is added to the Application Team.
Navigate to the application, and then select the Application Team option in the left navigation menu.
The List Application Team screen opens.
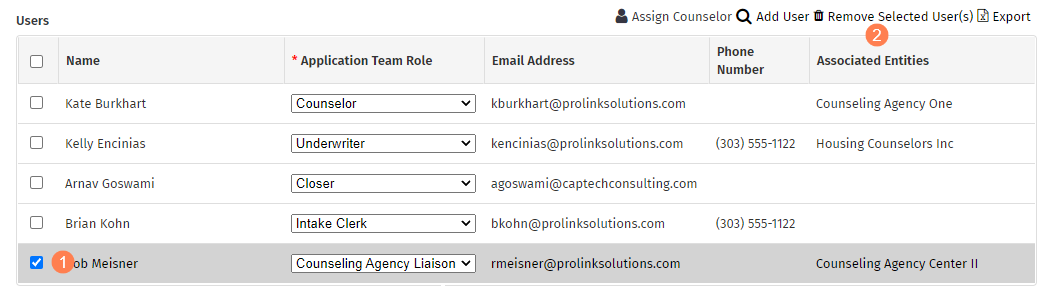
Select the checkbox of the row for the user to remove.
Click Remove Selected User(s) above the Users grid.
The user is removed from the Application Team. (The user remains a user in the system.)
The system automatically assigns a counselor to an application when it reaches Stage 2 - Submitted. You can also assign a counselor systematically before the application is submitted by clicking Assign Counselor above the Users grid.
The button is enabled if you have the security privilege, if the Property County has been selected on the application, and if no users have been assigned to the application with the Counselor role already.
When the application is submitted, the automated assignment engine will not assign another counselor to the application if one is already assigned.
Entities
The Entities section lists the external parties associated with the application. For example, when the application is submitted, any servicers or lenders selected on the Mortgage Info tab of the application are automatically added to the application.
See ProLink+ Entities for more information about Entity records in ProLink+.
Navigate to the application, and then select the Application Team option in the left navigation menu.
The List Application Team screen opens.
Click Add Entities above the Entities grid.
The Find Entity popup opens.
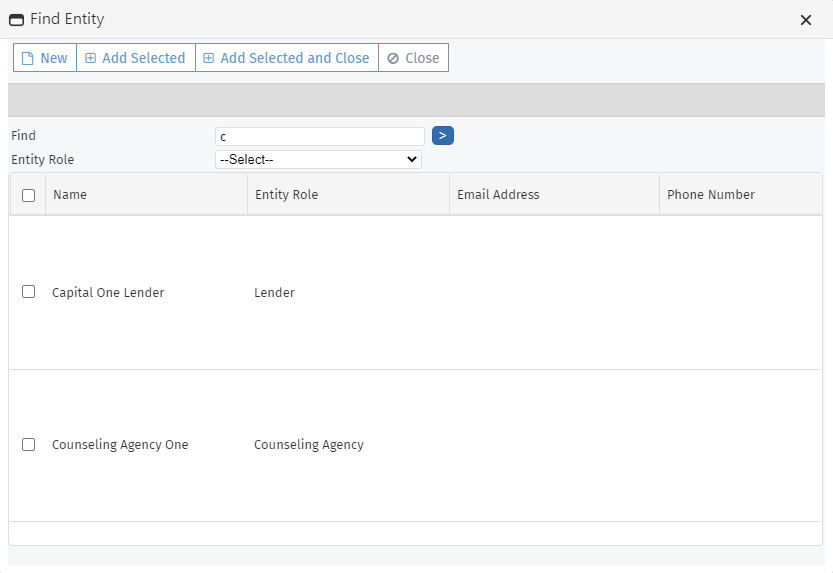
Enter any combination of search criteria (entity name, entity role), and then click Go.
Select the checkbox of the entity to add.
Click Add Selected and Close.
Tip
If you need to add multiple entities at one time, click Add Selected to keep the Find User popup open so that you can quickly add additional entities.
Note
If the system does not contain the entity, click New in the top toolbar to add it.
Caution
Before creating a new entity record, you should always perform a search to make certain the entity does not already exist. Creating duplicate entity records might create problems with reporting or when future updates are required.
The entity is added to the Application Team.
For an entity on the Application Team, you can add a contact from the contacts associated to the entity.
Navigate to the application, and then select the Application Team option in the left navigation menu.
The List Application Team screen opens.
Click Add Contact above the Homeowner Application Entity Contacts grid.
The Find Entity Contacts popup opens.

Enter any combination of search criteria (contact name, contact role), and then click Go.
Select the checkbox of the contact to add.
Click Add Selected and Close.
Tip
If you need to add multiple contacts at one time, click Add Selected to keep the Find Entity Contacts popup open so that you can quickly add additional contacts.
Note
If the entity record does not contain the contact, click New in the top menu bar to add it.
The contact is added to the application's contact list for the entity.
Navigate to the application, and then select the Application Team option in the left navigation menu.
The List Application Team screen opens.
Select the checkbox of the row for the contact to remove.
Click Remove Selected Contact(s) above the Homeowner Application Entity Contacts grid.
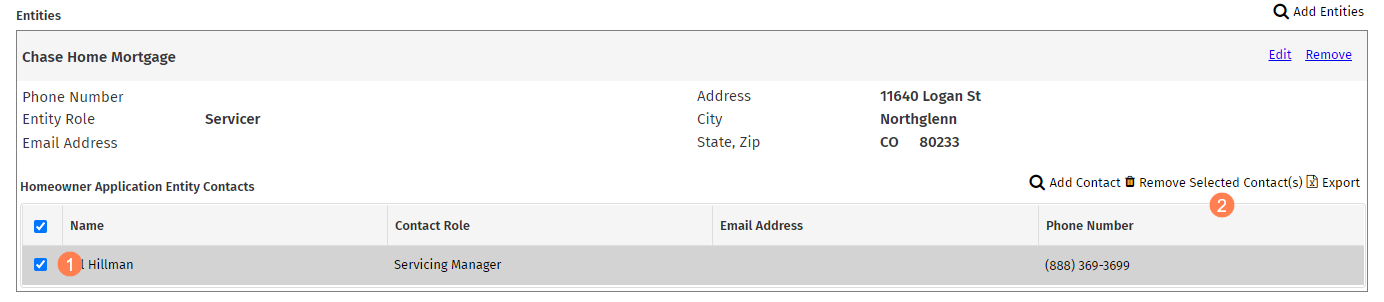
The entity is removed from the application's contact list for the entity. (The contact remains associated to the entity record.)
If you have the required security privileges, you can view and edit the entity details for an entity from an application's list of entities.
Navigate to the application, and then select the Application Team option in the left navigation menu.
The List Application Team screen opens.
Click Edit in the upper right corner of the entity information.

The Edit Entity screen opens.
See the Entities Management help information for details about editing the entity information.
Navigate to the application, and then select the Application Team option in the left navigation menu.
The List Application Team screen opens.
Click Remove in the upper right corner of the entity information.
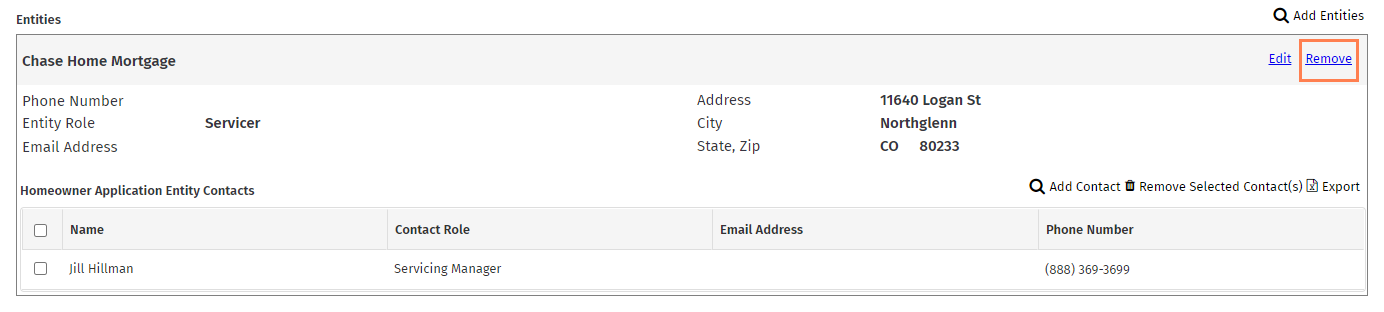
The entity is removed from the Application Team. (The entity remains an entity in the system.)