Create a New Data View
You cannot add a new data view to the application, but you can create a new view of an existing, default data view. Creating such a view is one way you can search for a select set of data records. This functionality also allows you to create ad-hoc reporting with current data to meet your unique reporting needs.
Note
General users can create private views available only to them. System administrators can create public views available to all users. Contact your system administrator if you have a view that would be beneficial to all users.
See Manage ProLink+ Data Views for information about Data View administration and public views.
Access ProLink+ and click Data Views in the left navigation panel.
Select the data view that is associated to the specific functional area.
The Default view is displayed.
Click View Manager in the top toolbar.
A window opens, showing all views associated with the data view.

Click New in the top toolbar.
The View Manager window changes to allow you to edit the view.
Edit the view.
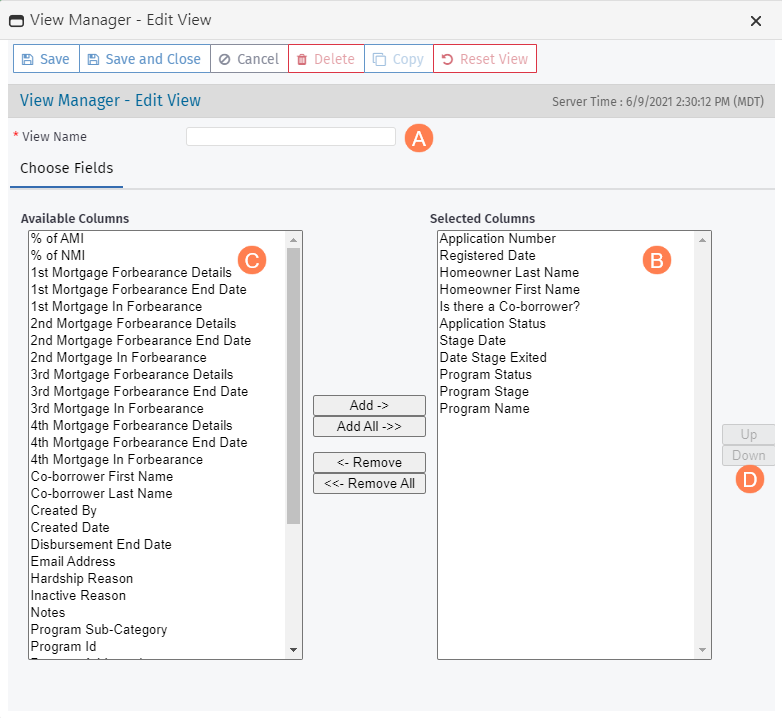
Enter a unique name in the View Name field.
Default columns (columns that appear in most data views) are displayed in the Selected Columns section. To remove a column from the Selected Columns, select one of the column headings, and then click Remove.
Click Remove All to remove all of the columns listed under Selected Columns.
Tip
You can select several columns to remove at the same time.
If the columns are adjacent, press and hold the Shift key while using the Up and Down arrows on the keyboard to select a series of columns.
If the columns are not adjacent, press and hold the Ctrl key while selecting the applicable columns.
To add a column to the data view, select one of the column headings from the Available Columns, and then click Add.
Click Add All to add all columns listed under Available Columns.
Tip
You can select several columns to add at the same time.
If the columns are adjacent, press and hold the Shift key while using the Up and Down arrows on the keyboard to select a series of columns.
If the columns are not adjacent, press and hold the Ctrl key while selecting the applicable columns.
To modify the order of the columns, highlight a column and click Up or Down on the right. Move the column to the appropriate location.
Click Save.