The Application Screen
On the Application screen, you can complete the required information on behalf of an applicant or review the information the applicant submitted through the Homeowner Portal. You can navigate through the application pages without completing all required fields. However, you cannot advance the application to the Submitted stage until certain required fields (blue asterisk *) are completed.
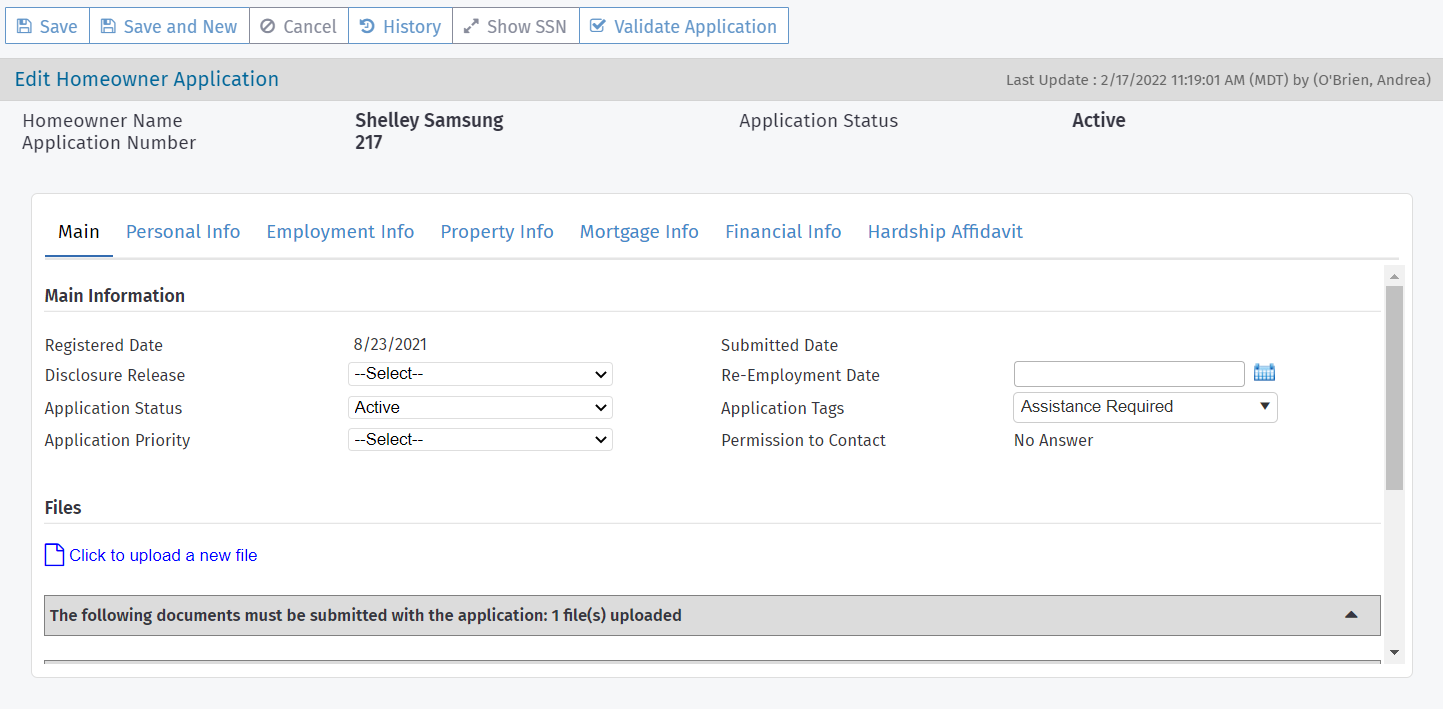
The Main tab provides high-level information about the application, including the overall application status. This status is different from the stage and status at the program level.
A number of the fields on this tab—including Application Status, Application Tags, and Application Priority—are available on the My Queue screen so that you can filter all applications by certain criteria.
Tip
Quickly see the application's tags from any application screen by checking the left navigation panel.
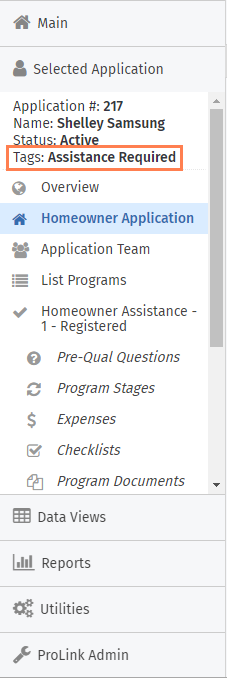
All users can see tags applied to an application; however, only users with the Application - Tags - Modify security privilege can add or change tags on an application.
Note
The system administrator can define the values of the Application Tags and Application Priority picklists (PL_Tag and PL_ApplicationPriority).
Permission to Contact
The Permission to Contact field is a read-only field that shows the applicant's answer on the "not eligible" screen of the Homeowner Portal, if applicable.
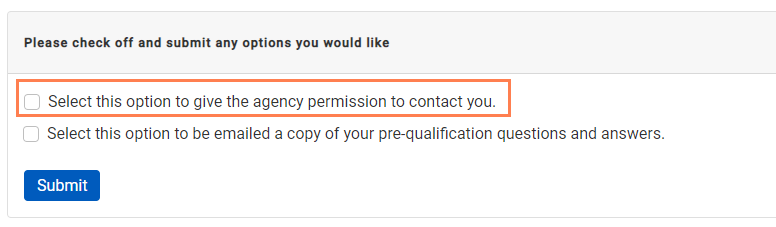
Not Eligible screen options
Note
ProLink configures the text for your agency, so the text the applicant sees may be different than the screenshot.
Database Value | Screen Value | Data View Value |
|---|---|---|
1 (checkbox selected and submitted) | Yes | Yes |
0 (checkbox cleared and submitted) | No | No |
NULL (ineligible application but applicant does not submit answers on the Ineligible screen OR eligible application) | No Answer | Blank |
Files
The Main tab is also where you will find a list of all files uploaded with the application, including Supporting Files—files that must be submitted with the application and additional files that may be submitted with the application.
Note
The system administrator or program manager defines the Supporting Files through the ProLink Admin panel.
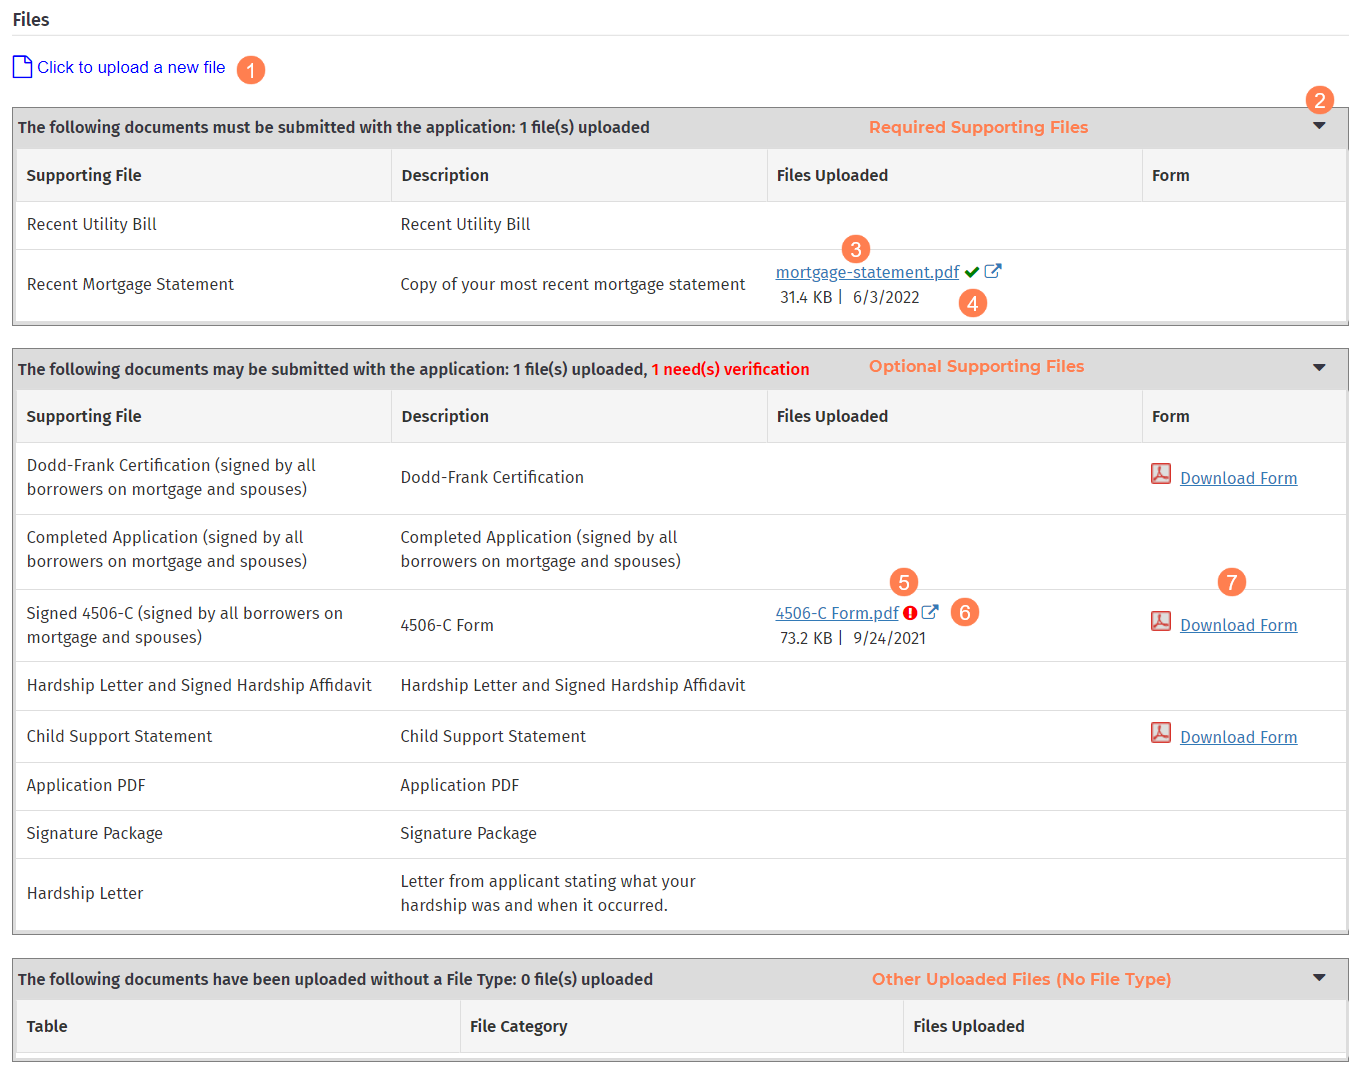
Click the link to navigate to the Edit File screen where you can upload a new file.
The files are grouped into three sections, each of which can be expanded or collapsed: required supporting files, optional supporting files, and other uploaded files.
Click the link to download the file. Below the file name, you can see the file size and updated date.
The green check mark indicates that agency staff has verified the file.
The red exclamation point indicates that agency staff has not verified the file.
Click the redirect icon to navigate to the Edit File screen for the file.
Click the Download Form link to download the form provided by the agency, if one exists.
To access all files associated to the Homeowner Application (not limited to uploaded files), select the Files option in the Selected Application menu of the left navigation panel.
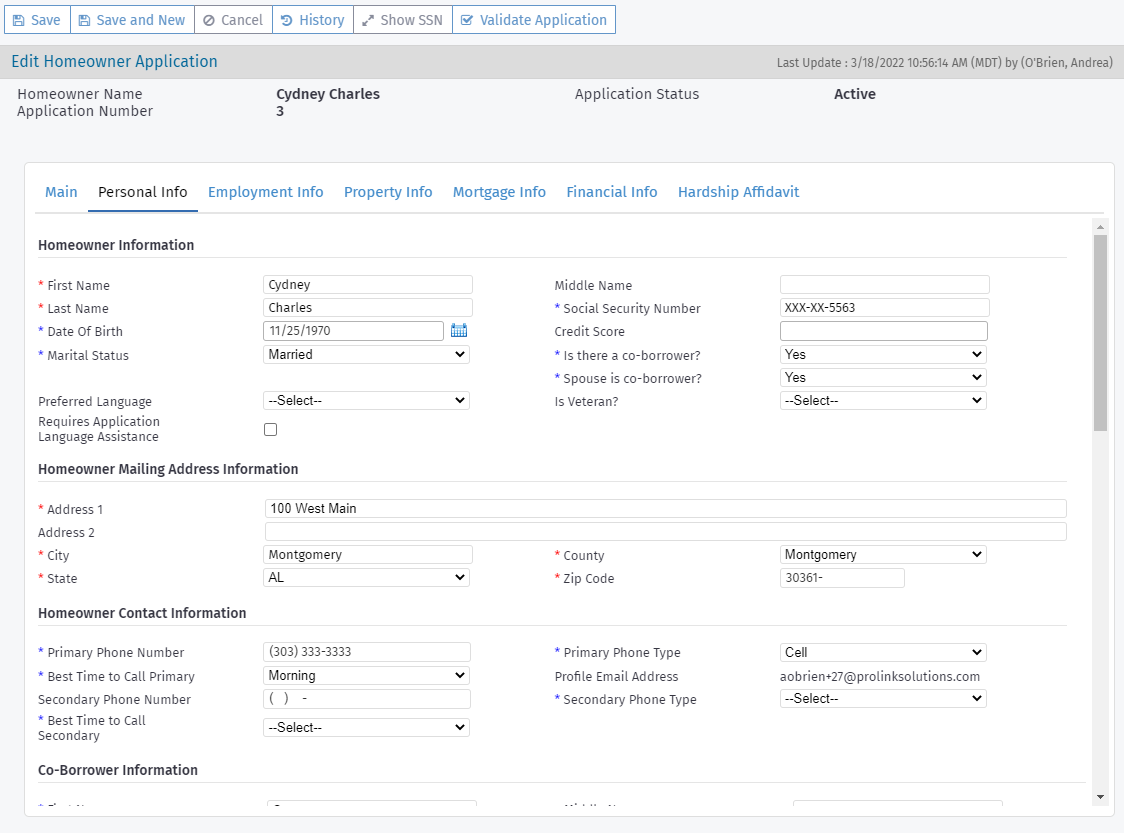
Most of the information in the Personal Info tab is recorded at application creation. Additional sections are available for the co-borrower and spouse, when those options are selected.
The Homeowner Portal and Agency Portal include validation that appears when you save a submitted application with a social security number (SSN) that already exists in the system for any application—for homeowner, co-borrower, or spouse. No error will be displayed if the SSN is the same and the profile (external user ID) is the same between applications.
After the application is created, the social security numbers are masked, showing only the last four digits. If you have the proper security privilege, you can click Show/Hide SSN in the top toolbar to show and hide the social security numbers on the Personal Info tab. Each time you navigate away from the selected Homeowner Application, the social security numbers are masked.
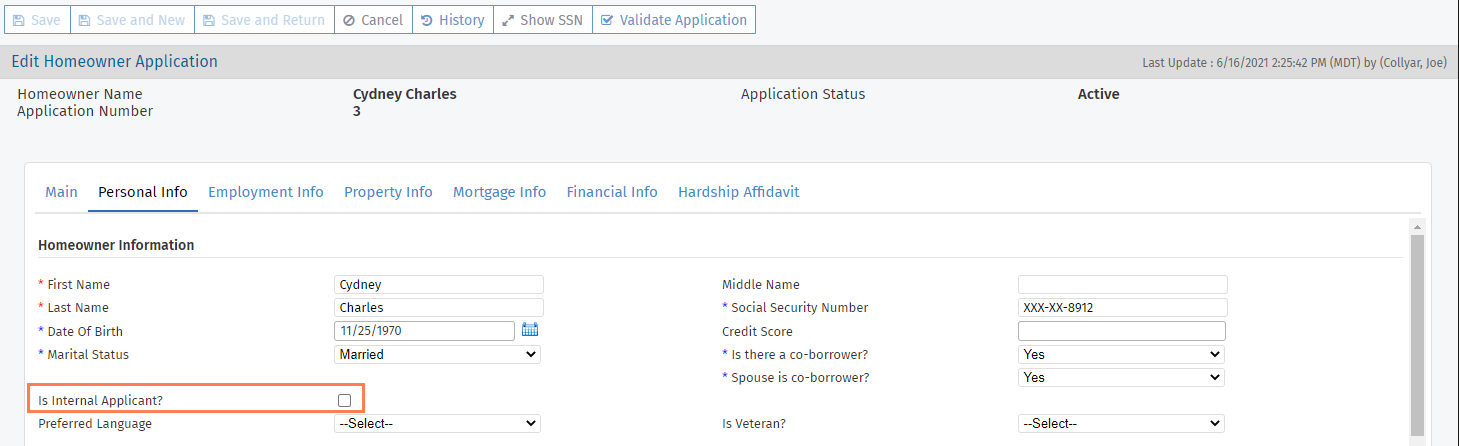
Internal Applicants
Important
The ability to flag internal applicants is controlled by a config setting and a security privilege.
Select the Is Internal Applicant checkbox to indicate the applicant is an internal Agency user. As a result, the Application record is excluded from search and data view results for the privacy of the employee/applicant.
Socially Disadvantaged Question
The ProLink Admin Config Settings includes a setting that indicates whether the Socially Disadvantaged question is required to submit the application.
In addition, the Homeowner Portal includes a front-end configuration that can hide or show the Socially Disadvantaged question on the application.


Some of the information in the Property Info tab is recorded at application creation.
The applicant's self-selection of whether they meet the definition of "socially disadvantaged" is recorded on the Property Info tab. The Agency can indicate its own Application Classification on Edit Program Qualification.
Note
The Agency can work with ProLink during implementation to customize the text in the Homeowner Portal that describes "socially disadvantaged."
Caution
The County and Total No. of Person Living at this Address fields help determine the total income pre-qualification question. If the county or number of persons changes, then the figure in the question also changes even if the question has been answered; once the application is submitted, the question is locked. Make sure to revisit the pre-qualification questions with the applicant if you update these fields.
Note
ProLink can configure the ProLink+ to hide the Judgments section on the Property screen in the Homeowner Portal and in the Agency Portal.
The Census Tract section shows census tract information for the property address. When you enter or update the property address and save the Homeowner Application record, the system queries the U.S. Census Bureau to retrieve the information. If a valid census tract is identified, the system updates the field. If no valid census tract is identified, the field remains blank.
The read-only Persistent Poverty County field shows the value (Yes or No) stored in the database for the property's county, and the read-only Majority Minority Census Tract field shows the value (Yes or No) stored in the database for the census tract, state, and county. These fields help in identifying and reporting on the social disadvantage status of a property.
The bottom of the tab collects more detail about the property, taxes and fees, and hazard insurance.

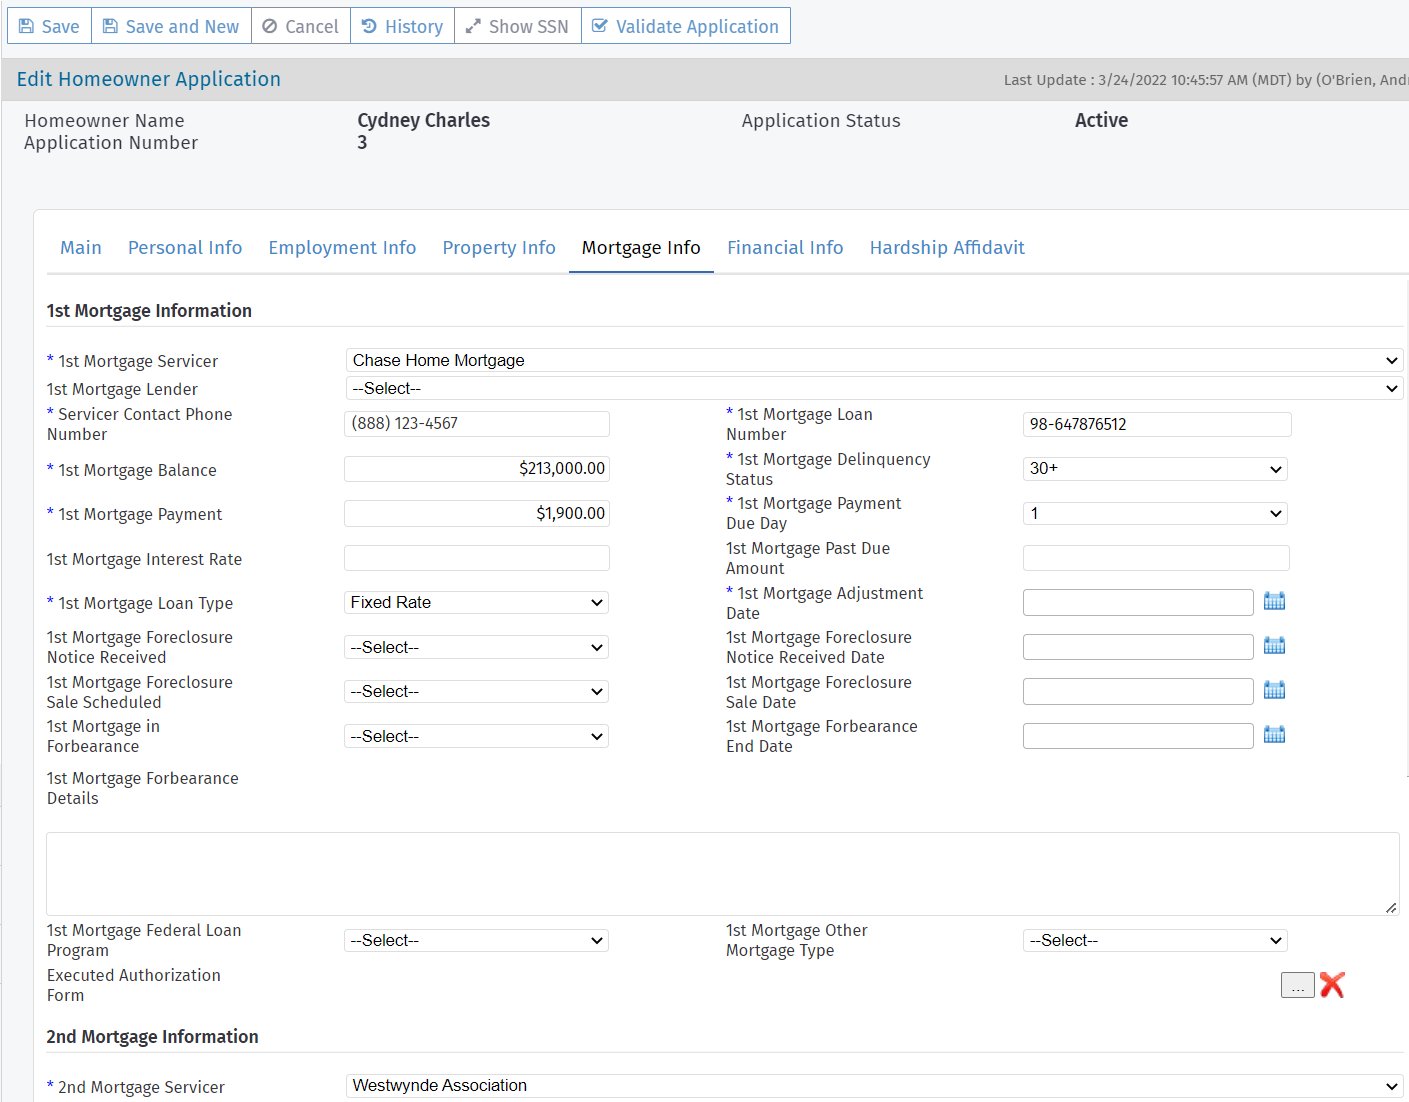
Up to four mortgages can be recorded. Information for at least one mortgage must be entered to advance the application to the Submitted stage.
Tip
If you need to record more than four mortgages, you can document the information in a spreadsheet and upload to the Homeowner Application Files. This information is then available for manual review and calculations as well as for audit purposes.
The Homeowner Portal and Agency Portal includes validation that appears when you save a submitted application with a servicer or loan number that is the same as the servicer or loan number for any other mortgage for the same servicer entity on any application. No error will be displayed if the servicer and loan number are the same and the profile (external user ID) is the same between applications.
"Other" Servicer or Lender
If the applicant selected "Other" as the Servicer or Lender, a user with the proper security permissions will need to add the Service or Lender as an entity in the system before the application can advance to Stage 4 - Underwriting. See ProLink+ Entities for more information.
ProLink can configure the Homeowner Portal to hide the Lender field on the Mortgage screen and Application Summary screen. When this configuration is set up, then the conditional validation for the field in the Agency Portal is also turned off.
You can also bypass the Servicer field conditional validation for mortgages 2–4; for example, because benefits payments will not be made on those mortgages.
Important
This functionality is determined by a config setting called AllowOtherMortgageServicerOverride. When the config setting is False, the system follows standard behavior (cannot advance applications with an "Other" servicer). When the config setting is True, the Mortgage Info tab shows the Bypass Stage Validation checkbox when "Other" is selected for the servicer of mortgages 2, 3, or 4.

The Bypass Stage Validation checkbox is enabled for users with one of the following security privileges:
Application - Mortgage - Override Other Servicer Validation (new)
Administrative Modify
With the AllowOtherMortgageServicerOverride funtionality enabled, you can advance the application to Stage 4 (Underwriting) when mortgage(s) 2–4 have a servicer of "Other" if the Bypass Stage Validation checkbox is selected for those mortgage(s).
In addition, mortgages 2–4 with an "Other" servicer are not shown in the Payments grid on the Edit Program Qualification screen and are not available when creating manual disbursements.
Executed Authorization Forms
The agency might be responsible for collecting third party authorization forms (called executed authorization forms in ProLink+) from the homeowner and providing to the mortgage servicer. You can indicate the Executed Authorization Form for a mortgage on the Mortgage Info tab.
If the system configuration is set up to support it, you can export the Executed Authorization Forms with the common data file (CDF). See Export Executed Authorization Forms with CDF I Records. While you can upload any file type here, the file type must be a PDF if you want to export the form with the CDF.
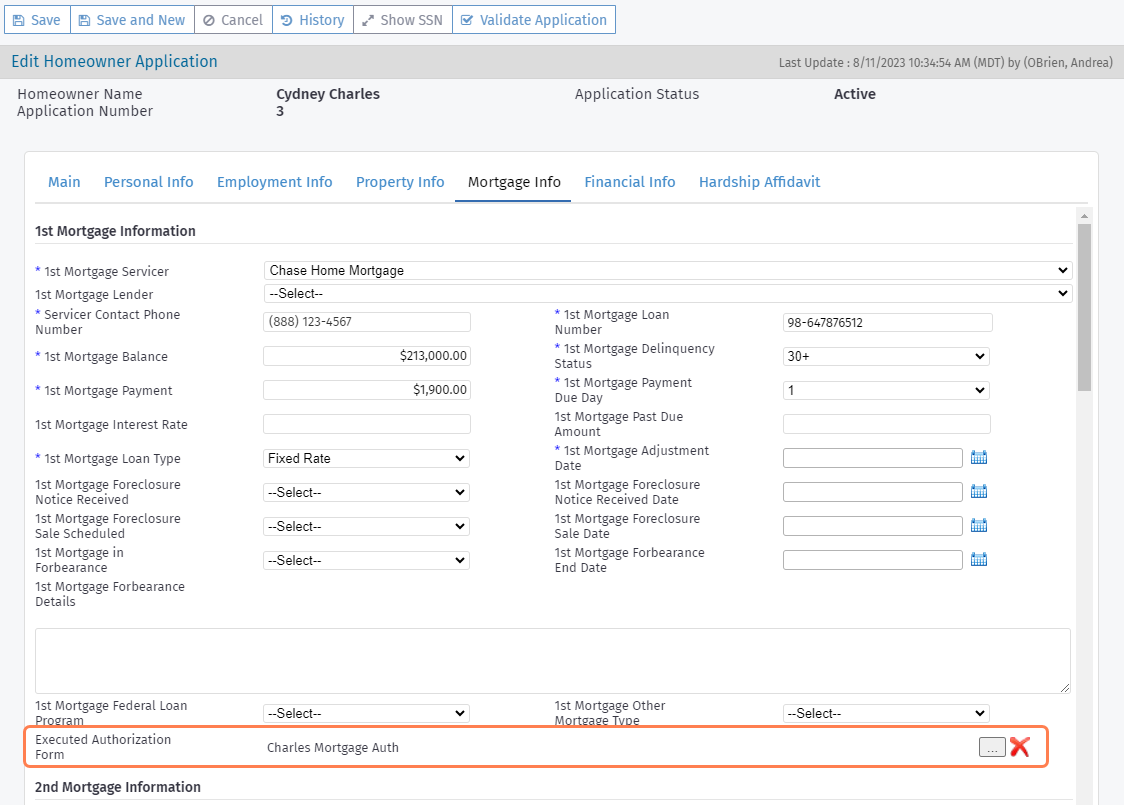
Navigate to the Homeowner Application.
Select the Mortgage Info tab.
Scroll to the applicable mortgage—first, second, third, or fourth.
Click
 to open the Find Executed Authorization Form popup.
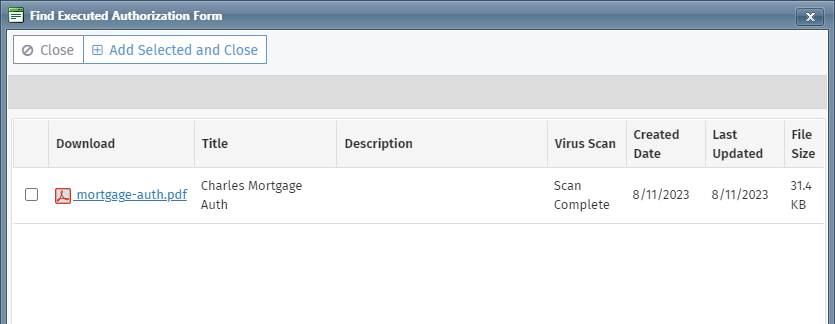
Select the checkbox of the file to associate to the mortgage. You can only select from the application files with a File Type of Executed Authorization Form.
Click Add Selected and Close.
The system associates the selected form with the mortgage.

Information collected about income and expenses is at the monthly level.
The Program Expense Information section displays the sum for expense category on the application. This information is entered through the Expense menu option in the Agency Portal or through the Property Information screen in the Homeowner Portal.
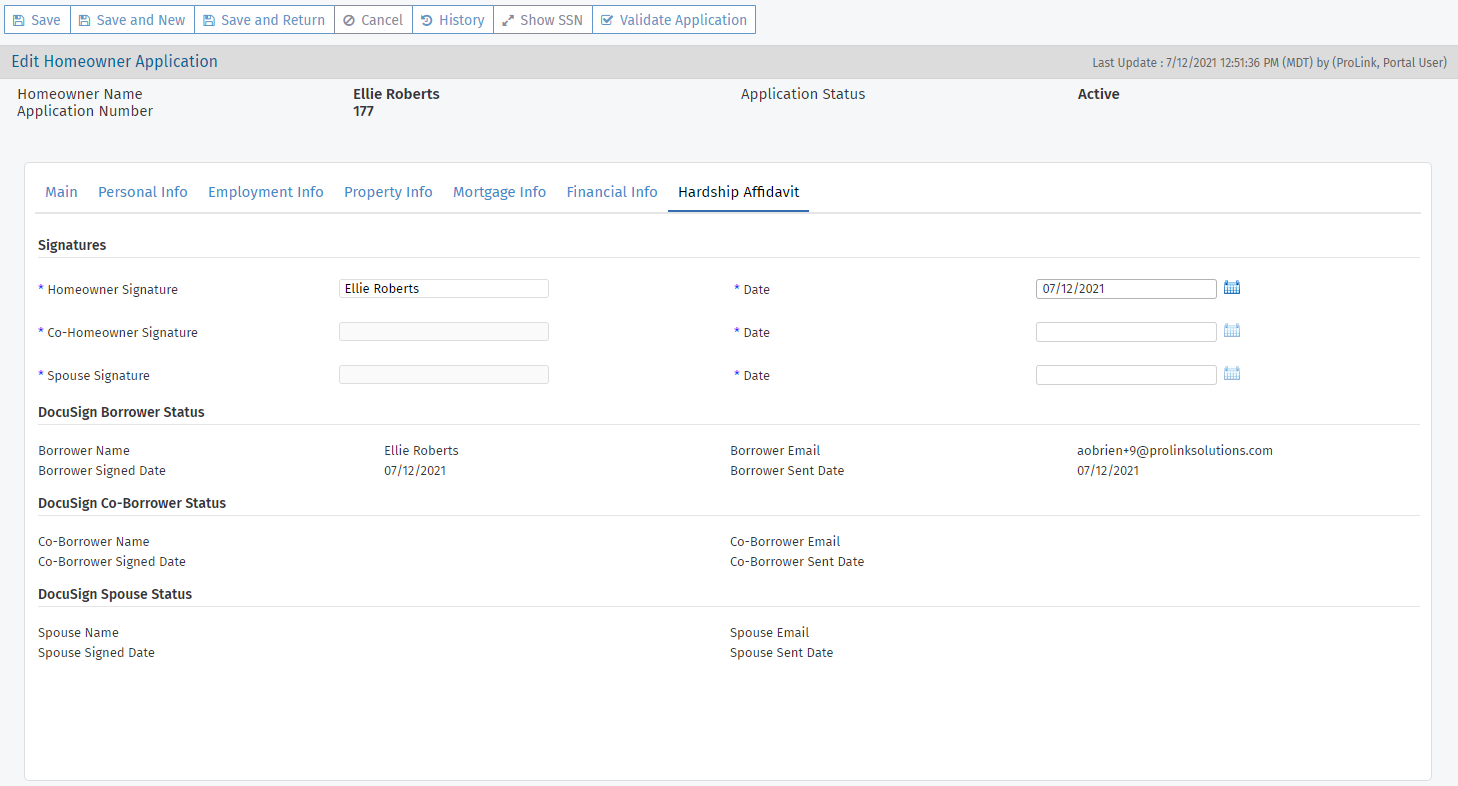
The Hardship Affidavit is a legal form used to document the applicant's financial hardship in connection with the assistance programs and explain the reasons the applicant could be a candidate for assistance.
A signed Hardship Affidavit is required for assistance approval. When the applicant completes the application and the Hardship Affidavit through the Homeowner Portal, they (and their co-borrower and spouse if applicable) receive the document to sign electronically via DocuSign.
Note
ProLink Admin Configuration Settings include a setting that allows the system administrator to enable or disable the DocuSign functionality.
When the setting is enabled, the applicant (and co-borrower and spouse if applicable) will sign the Hardship Affidavit electronically using DocuSign. When the setting is disabled, the Agency will deliver any necessary paperwork for the applicant to review. Then the applicant will enter their name and date in the corresponding fields in the Homeowner Portal. By filling in their name and date, they effectively sign the Hardship Affidavit electronically. The Agency can also populate the name and date fields through the Agency Portal.
For the rare scenario where DocuSign is enabled but the applicant signs a physical copy of the Hardship Affidavit, when the Agency populates the name and date fields in the Agency Portal, the Homeowner Portal displays that signature name and date.
View the "signatures," dates, and status on the Hardship Affidavit tab of the Edit Homeowner Application screen.
When an application moves to Stage 2 - Submitted, a copy of the signed (DocuSign) Hardship Affidavit is saved to the Supporting Files screen in the Homeowner Portal. The same file is saved to the Files screen on the application in the Agency Portal.
Click Validate Application in the top toolbar to learn what items need to be completed before you can advance the application to the Submitted stage.

Tip
Take a screenshot of the message or copy and paste the error text from the screen to a document on your computer to help you see the remaining items as you work through the application.