Manage Picklists
This information is for system administrators who are responsible for setting up picklists and picklist values in ProLink+.
A picklist is a drop-down list that presents a finite set of choices for a field. A picklist can be:
A system picklist where all values are defined by ProLink
A non-system picklist where you define the values

Only ProLink can create a new picklist.
Navigate to the ProLink Admin panel, and then select Picklists in the left navigation menu.
The List Picklist Tables screen opens.
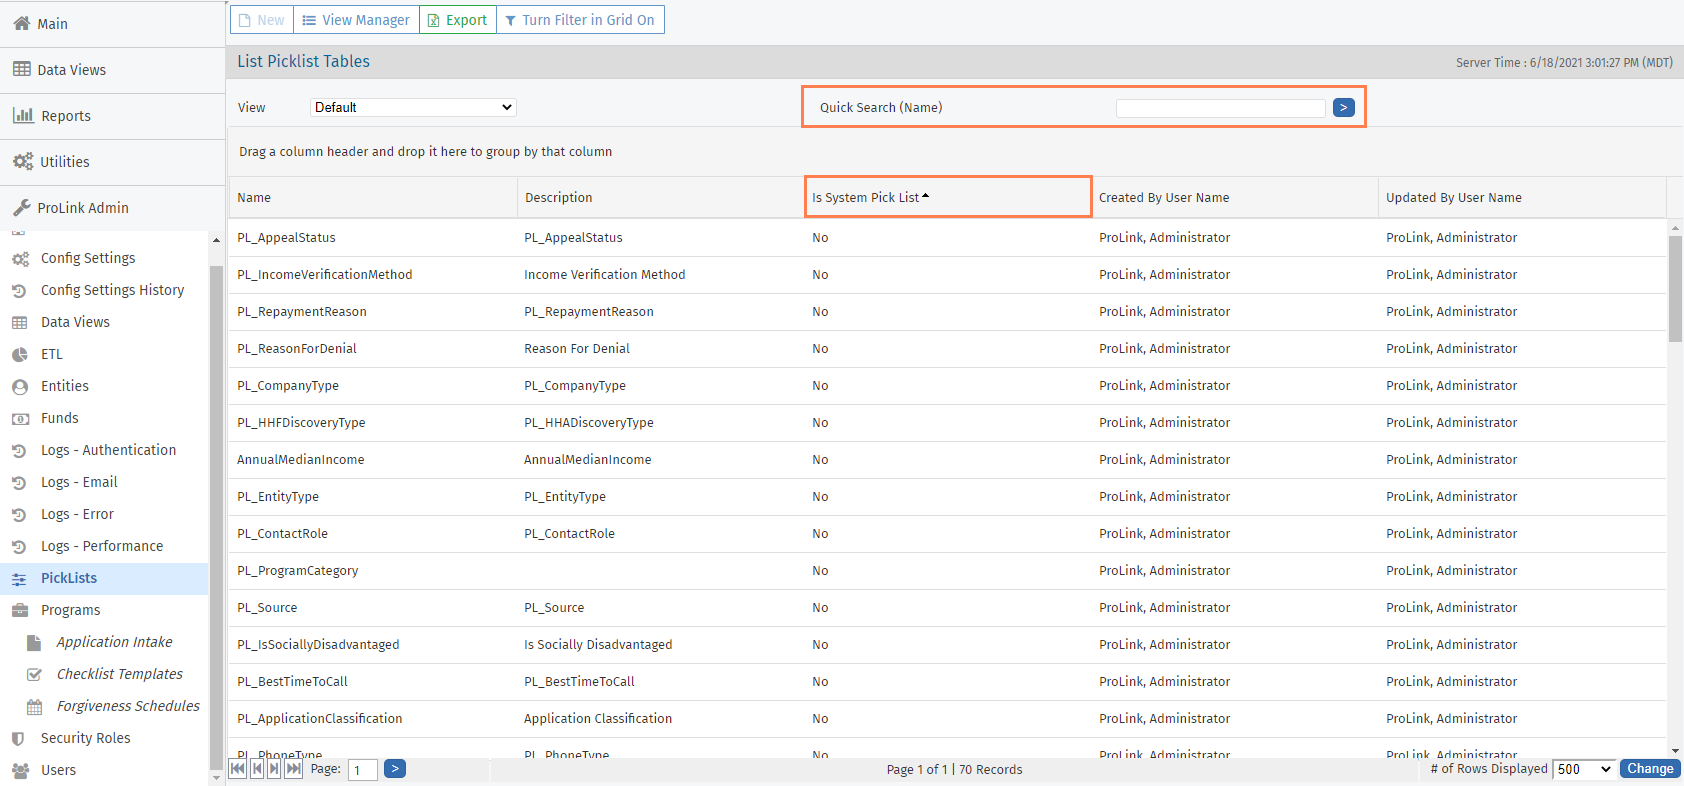
The screen is a data view screen, which means you can filter, sort, search, and create custom views, like other data views.
Click a row to open the Picklist record and review its details.
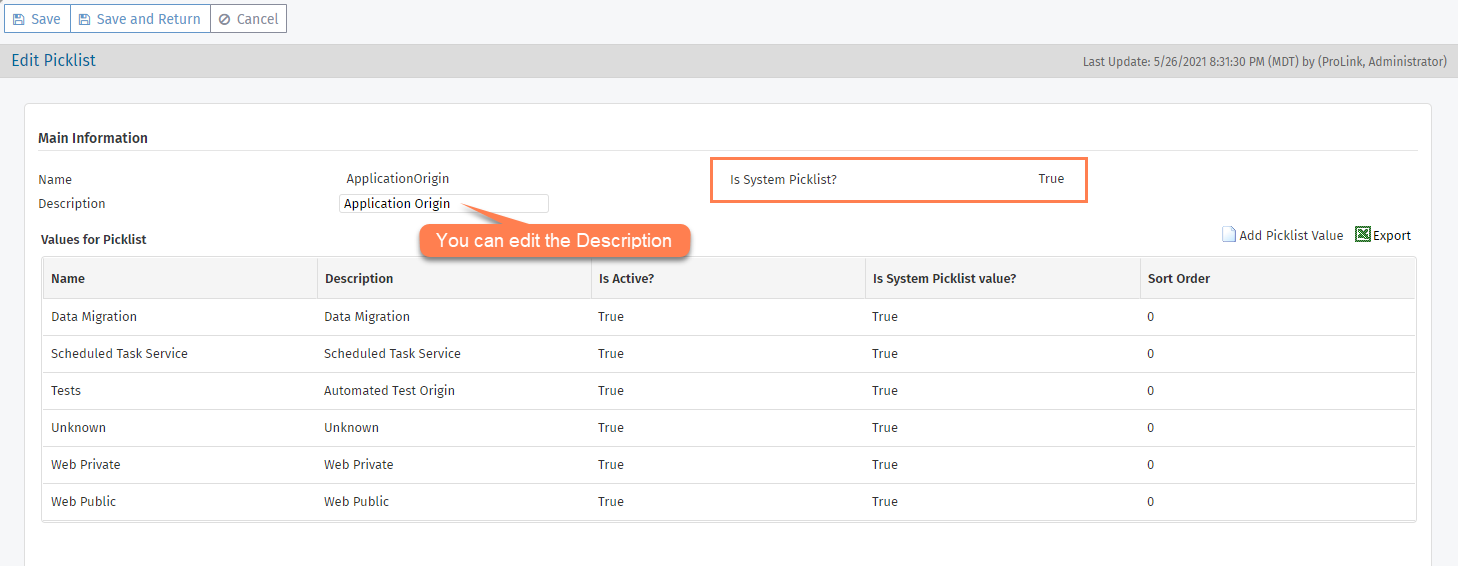
From the Edit Picklist screen for non-system picklists, you can click into a row in the Values for Picklist grid to see the details about a particular value.

Navigate to the ProLink Admin panel, and then select Picklists in the left navigation menu.
The List Picklist Tables screen opens.
Use the quick search, in-grid filtering, or other data view tools to find the picklist you want to edit.
Tip
Sort or filter by the Is System Pick List column.
Click the row of the picklist.
The Edit Picklist screen opens.
Sometimes the name users see as the drop-down list on screen does not match the name in Admin>Picklists. We recommend you verify it is the picklist you intend to edit by reviewing the description and the values. Confirm that the drop-down list on the corresponding screen reflects these values.
Optionally, edit the Description.
Tip
You can add as much detail to the Description to help you and other admins quickly recognize the purpose and location of the picklist.
Add a Picklist Value:
Click Add PickList Value above the Values for Picklist grid.
Enter a display Name for the value.
Select the Is Active checkbox so that users see the value when the encounter the picklist in the system.
Optionally, enter a Description of the value.
Optionally, enter the Sort Order.
The Sort Order determines the order the values are displayed. Use a Sort Order of 0 (zero) on values to default to an alphabetical sort.
Click Save and Return.
Click Save.
Although you cannot delete a picklist or picklist values (even non-system ones), you can inactivate values so they are unavailable to system users. The reason for this is to retain historical data.
If an inactive value had been selected on a record previously, then the system appends the value on the record with "Inactive."
If you were to inactivate all values of a non-system picklist, users would not be able to select anything in the system for the picklist.
Note
When you inactivate a value for a picklist used in the Homeowner Portal, then the applicant will not see the value.
Program Category Picklist
The PL_ProgramCategory picklist allows you to define subprograms for ProLink+ programs. For more information about programs, see Programs.
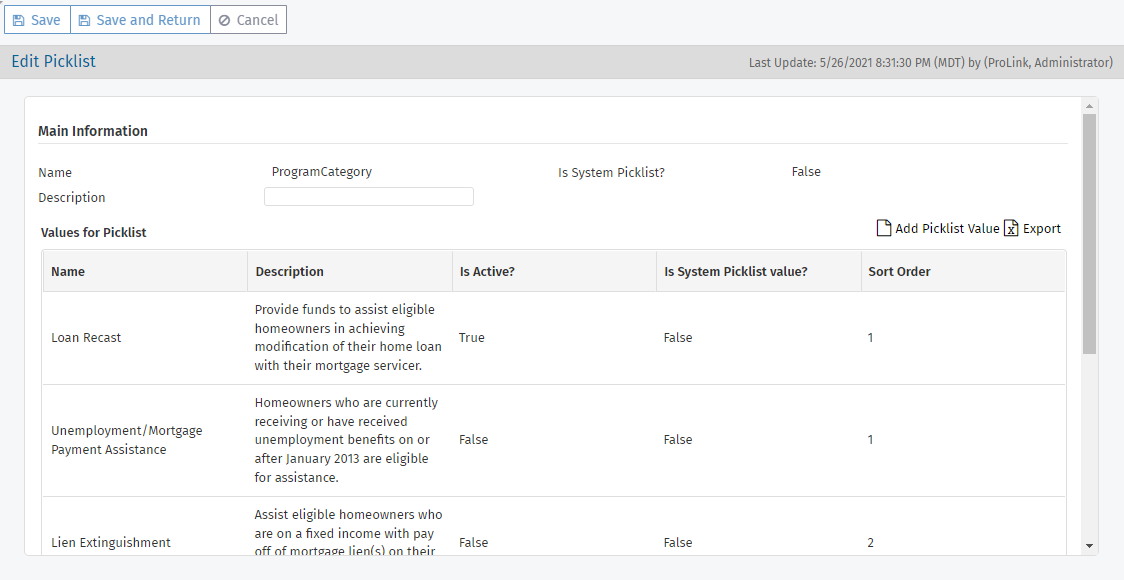
Each picklist value represents a program category.
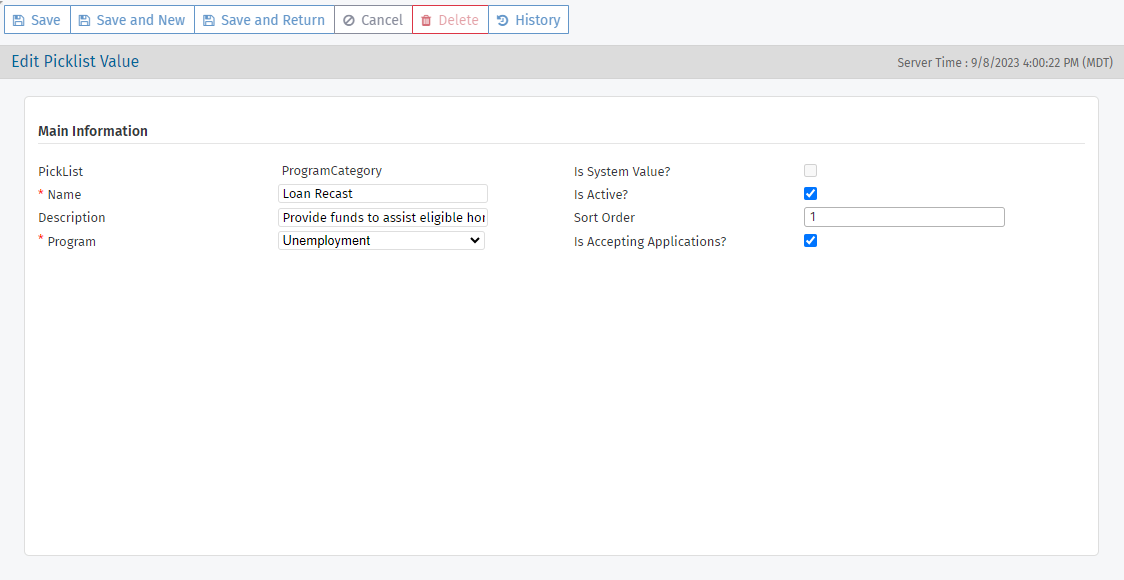
You can specify:
The program category Name
Whether the program category Is Active
A description
The Sort Order in which the program category is shown on the Homeowner Portal
The Program that the program category belongs to
Whether the program category Is Accepting Applications
When the program category is active and accepting applications, it is visible in the Homeowner Portal.
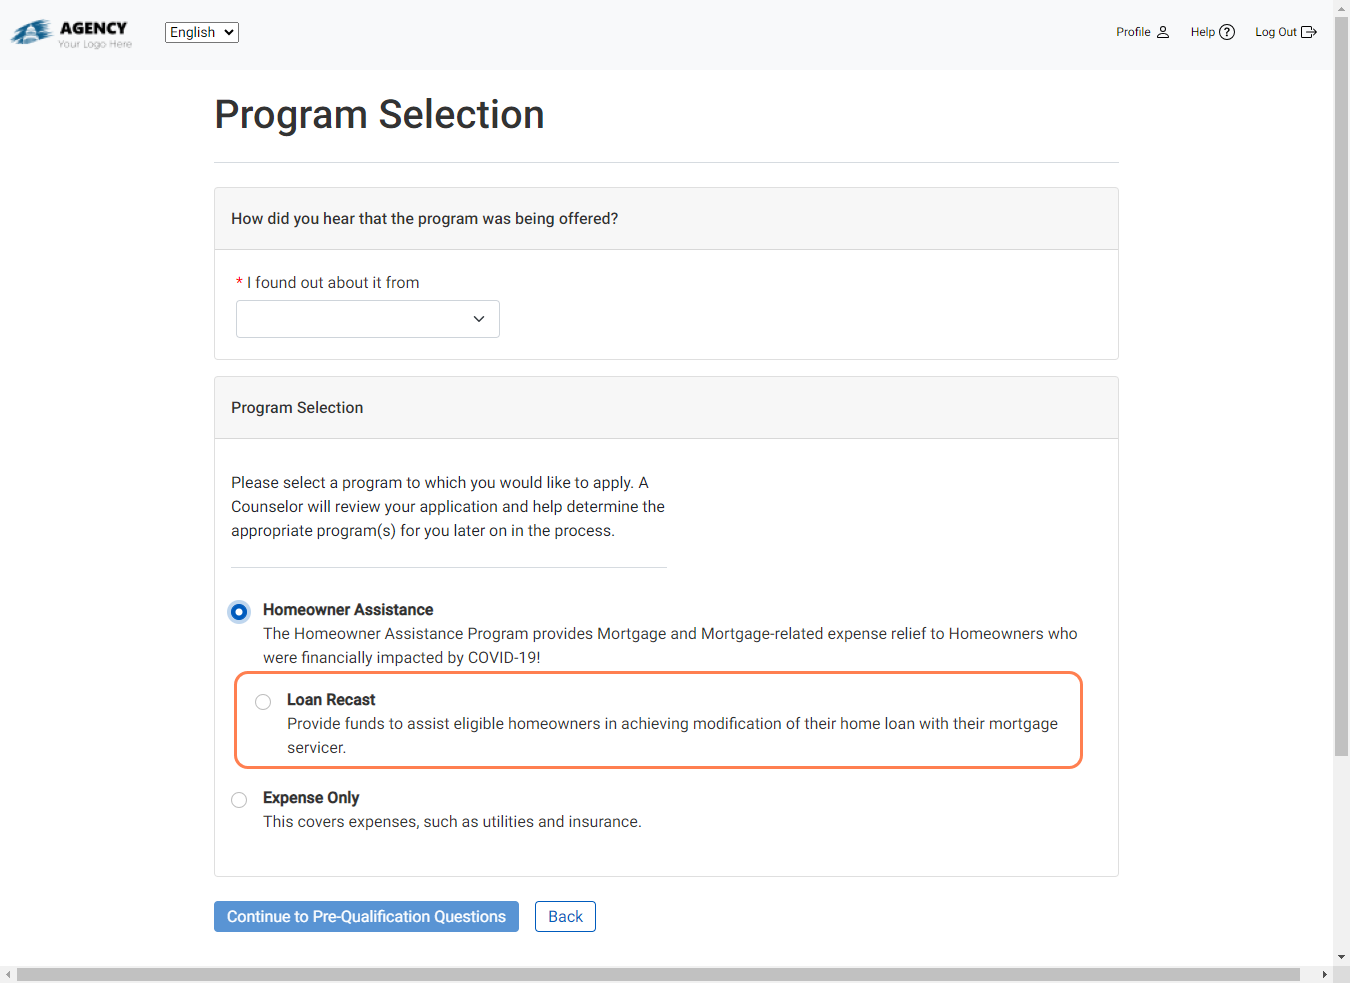
You can turn off application intake for a program category while continuing to accept applications for other program(s). As such, you can continue to process applications in the back office for a program subcategory, even though it is no longer available in the Homeowner Portal.