Manage ProLink+ Data Views
This information is for system administrators who are responsible for maintaining data views in ProLink+.
The ProLink+ reporting tool, Data Views, allows you to analyze information across the database. The system includes a number of configurable data views that provide detail on homeowner applications, program qualifications, program stages, and more.
The Data Views option in the ProLink Admin menu allows you to see information about the data views in the application. You can also add, change, and delete public data views.
Each data view begins with a ProLink "default" view. If you want to create a custom public view, you should create a new view. If you change the ProLink default view, your changes will be overwritten with the next release.
Navigate to the ProLink Admin menu, and then select Data Views in the left navigation panel. The List Data Views screen opens.
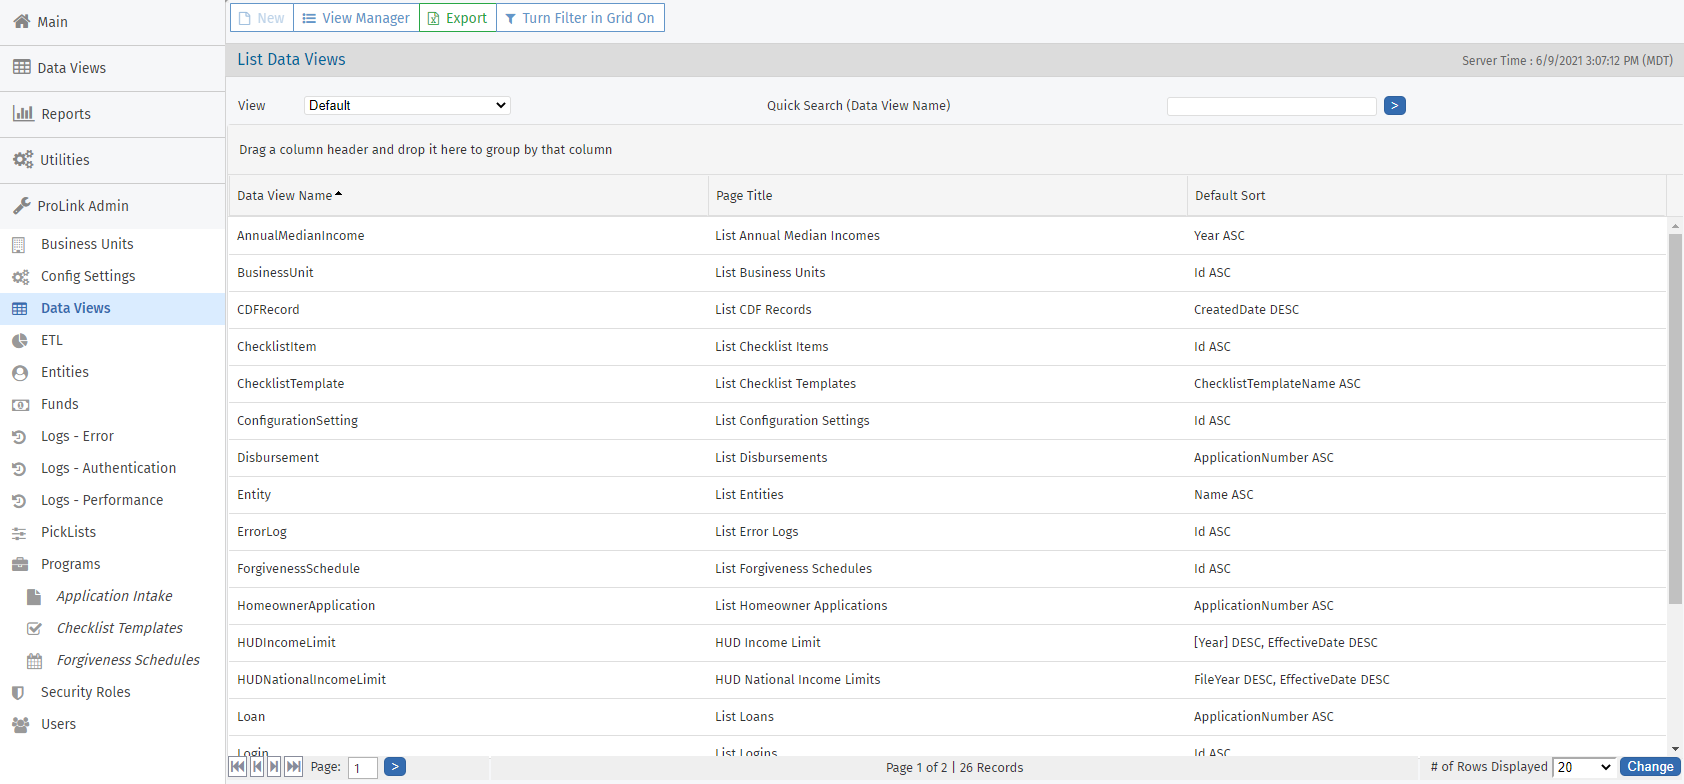
The screen is a data view screen, which means you can filter, sort, search, and create custom views, like with other data views.
See the Introduction to Data Views for introductory information about data views.
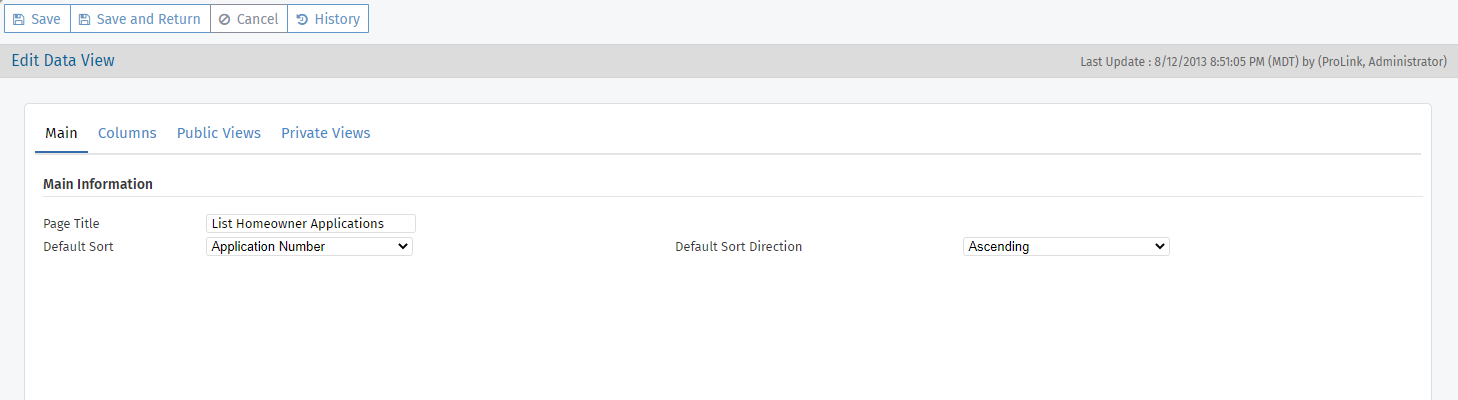
Click a row to open the Data View record and review its details. The Edit Data View screen opens, and includes the following tabs:
Main—Edit the page title. You can also set up default sorting for one column in the data view. Select the column to sort in the Default Sort list, and then select the direction to sort that column in the Default Sort Direction list.
Columns—View the columns available in a data view. Click a row to open the Edit Data View Column screen to edit the column.
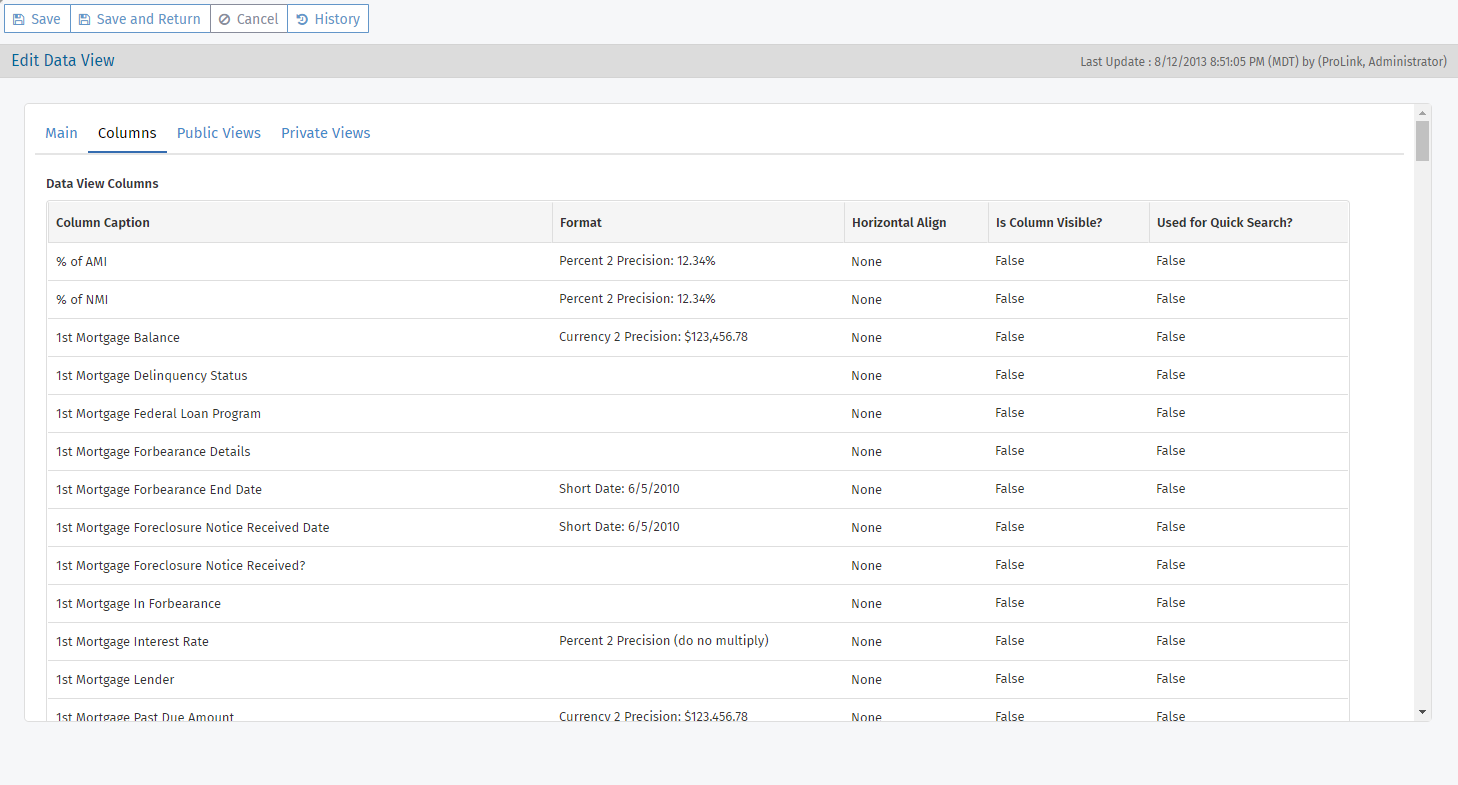
Column Name—The column name in the database (read only).
Column Caption—The column header name as seen by users in the Data View screen.
Column Width—The horizontal size of the column. You can increase or decrease the number to adjust the column span.
Format—For numeric and date data, you can specify how the data is displayed.
Horizontal Align—You can specify the alignment of column data (such as right, left, center, justify).
Is Column Visible—If you select the checkbox, the column is visible on screen in the Default View.
Is Quick Search Field—If you select the checkbox, users can search the data view by the column contents.
Sum in Footer—If you select the checkbox, the application calculates the sum of the column contents in the footer.
Sum in Group—If you select the checkbox, when users group by the column, the application calculates the sum of the group contents.
Public Views—See the public data views available to users for the selected data view. You can create a new public data view.
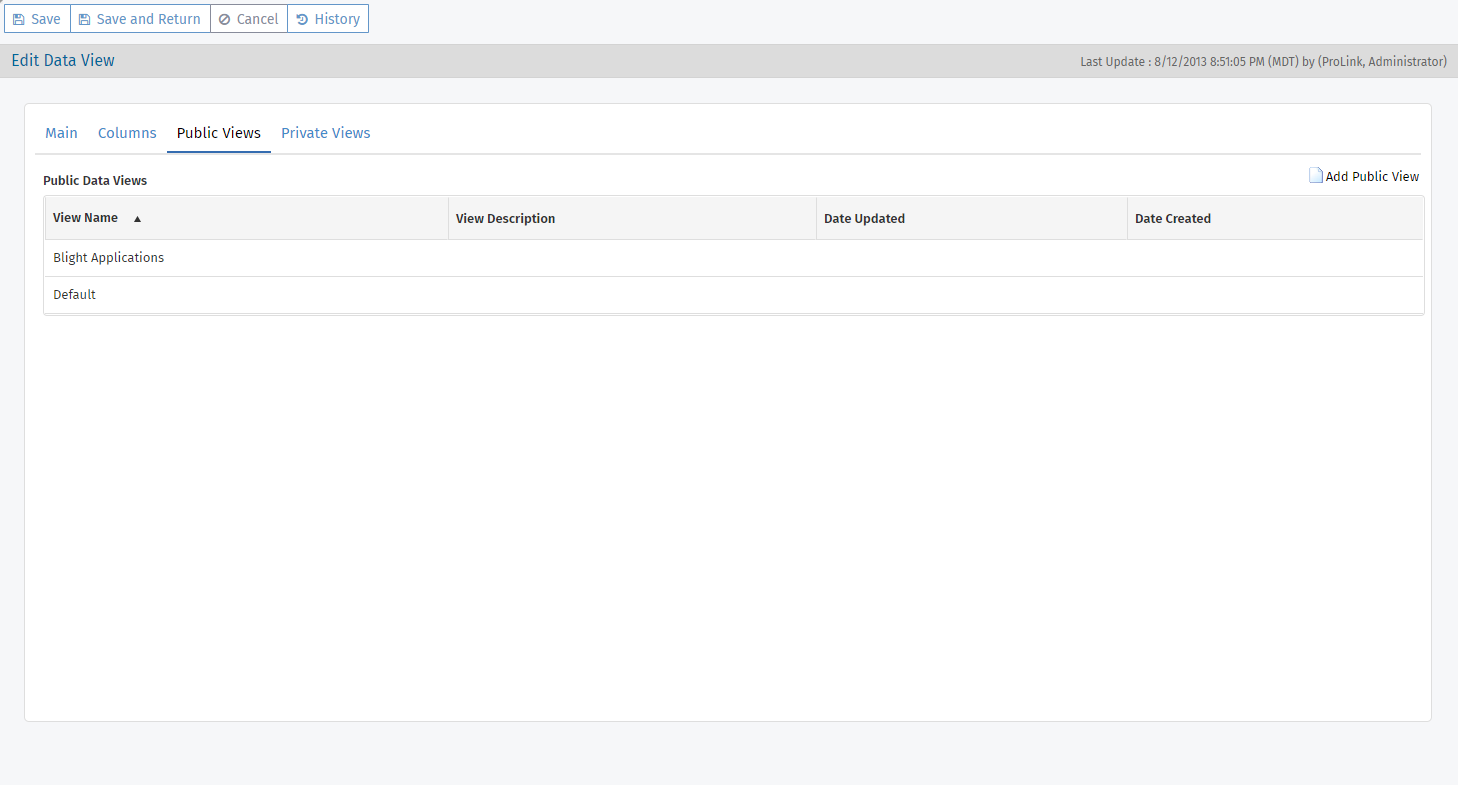
Click a row for a specific view to see and edit the public view.

Toolbar for Edit View screen: Cancel to return to the previous Edit Data View screen; use the View Manager to see and edit the view configuration; create a public Copy of the view; or delete the view (you cannot delete ProLink's default view).
Private Views—See the private views that users have created for the selected data view.
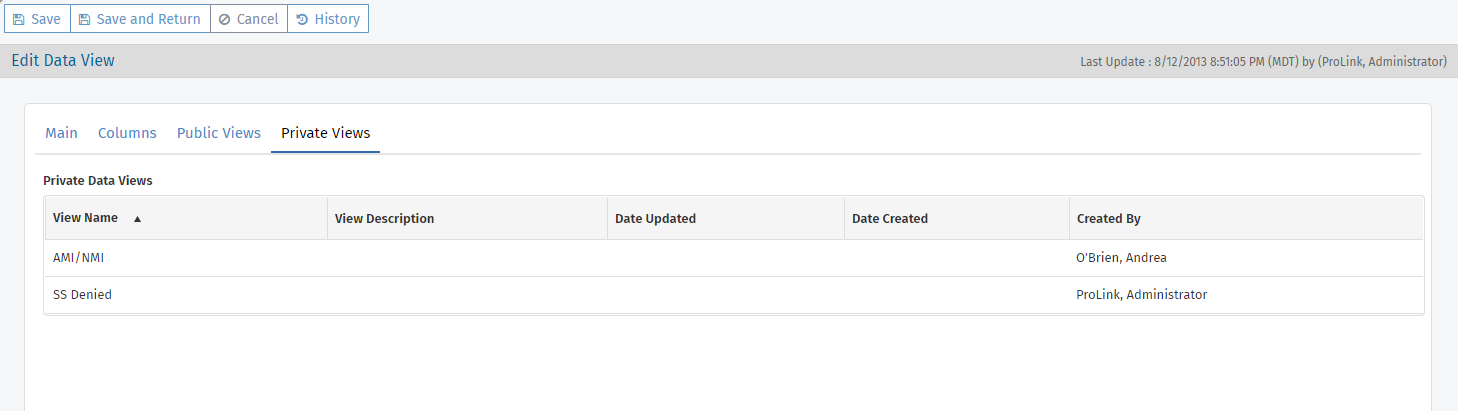
Click a row for a specific view to see and edit the private view. Keep in mind a user created the private view to meet their reporting needs. We recommend exercising good judgement when determining whether to edit another user's private view; for example, to help troubleshoot an issue the user is having with the view.

Toolbar for Edit View screen: Cancel to return to the previous Edit Data View screen; use the View Manager to see and edit the view configuration; create a private Copy of the view belonging to you; or delete the view (not recommended unless authorized by the user who created the view).
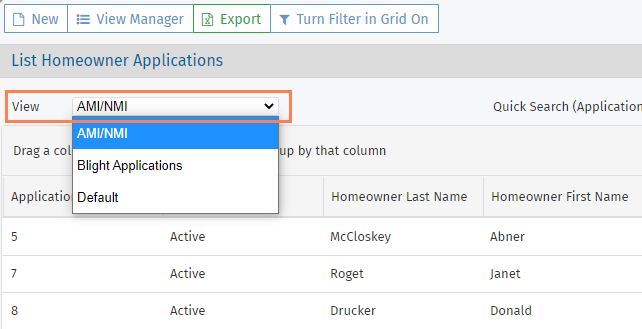
All users can view the public views you create. When they open a data view, they can select from the available views in the View list.
Navigate to the Admin menu, and then select Data Views in the left navigation panel.
Search for and then select the default data view from which to start.
Click the Public Views tab.
Click Add Public View.
A new view opens, named "New Public View {sequence number}".
Tip
Alternatively, if an existing public view (default or custom) is similar to what you want, you can open it and click Copy in the top menu bar.
Click View Manager.
Edit the view.
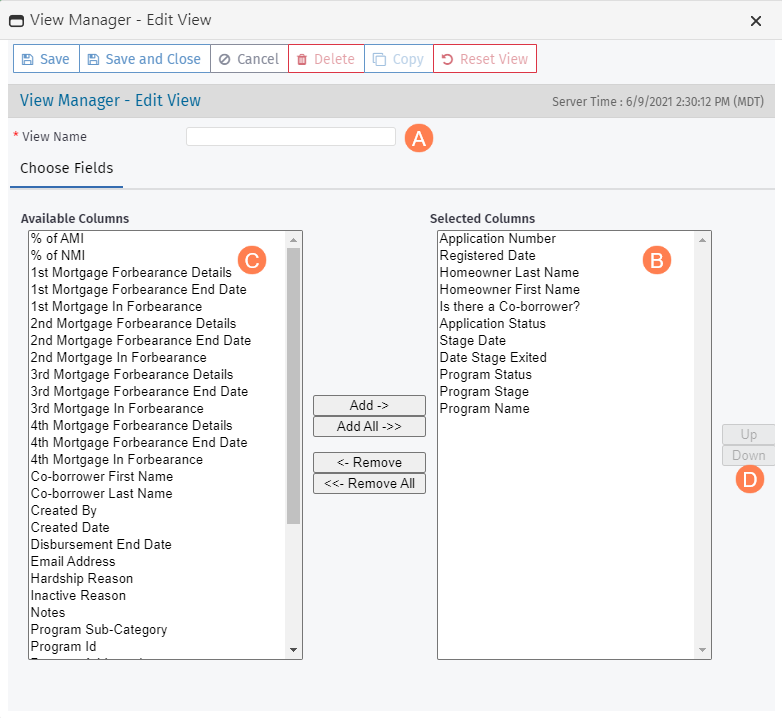
Update the View Name to a unique, meaningful name.
Default columns (columns that appear in most data views) are displayed in the Selected Columns section. To remove a column from the Selected Columns, select one of the column headings, and then click Remove.
Click Remove All to remove all of the columns listed under Selected Columns.
Tip
You can select several columns to remove at the same time.
If the columns are adjacent, press and hold the Shift key while using the Up and Down arrows on the keyboard to select a series of columns.
If the columns are not adjacent, press and hold the Ctrl key while selecting the applicable columns.
To add a column to the data view, select one of the column headings from the Available Columns, and then click Add.
Click Add All to add all columns listed under Available Columns.
Tip
You can select several columns to add at the same time.
If the columns are adjacent, press and hold the Shift key while using the Up and Down arrows on the keyboard to select a series of columns.
If the columns are not adjacent, press and hold the Ctrl key while selecting the applicable columns.
To modify the order of the columns, highlight a column and click Up or Down on the right. Move the column to the appropriate location.
Complete advanced filtering as needed.
Click Save and Close.
Click Cancel to return to the Edit Data View screen.
The view you created is included in the Public Views list.
Click Save.
You can create a new public view with the same setup as a private view. This option is helpful when a user has a private view that should be made available to other users.
Navigate to the Admin menu, and then select Data Views in the left navigation panel.
Search for and select the parent data view.
Click the Private Views tab.
Select the view to copy.
Click Create Public Copy.
A new view opens, named "{private view name} (Public Copy)".
Open the View Manager to make any adjustments, including renaming the view, as needed.
Click Cancel to return to the Edit Data View screen.
The public copy of the view is included in the Public Views list.